Creating a bubble button animation on Android

This tutorial shows how to animate a button with bounce effect on Android using Android Studio version 2.3.
I assume that you know how to create an app in Android Studio. If you don’t have this experience yet then I would recommend reading the excellent Building Your First App tutorial from Google first.
1) Add a button view
We begin by placing a button in the activity layout file res/layout/activity_main.xml.
<?xml version="1.0" encoding="utf-8"?>
<android.support.constraint.ConstraintLayout xmlns:android="http://schemas.android.com/apk/res/android"
    xmlns:app="http://schemas.android.com/apk/res-auto"
    xmlns:tools="http://schemas.android.com/tools"
    android:layout_width="match_parent"
    android:layout_height="match_parent"
    tools:context="com.evgenii.sixbouncingbuttons.MainActivity">

    <Button
        android:id="@+id/button"
        android:layout_width="92dp"
        android:layout_height="92dp"
        android:onClick="didTapButton"
        android:background="#FFA400"
        app:layout_constraintBottom_toBottomOf="parent"
        app:layout_constraintLeft_toLeftOf="parent"
        app:layout_constraintRight_toRightOf="parent"
        app:layout_constraintTop_toTopOf="parent" />

</android.support.constraint.ConstraintLayout>
2) Create a scale animation
Next, we create an animation file res/anim/bounce.xml for scaling views.
- Right click on the res folder.
- Select New / Android resource file.
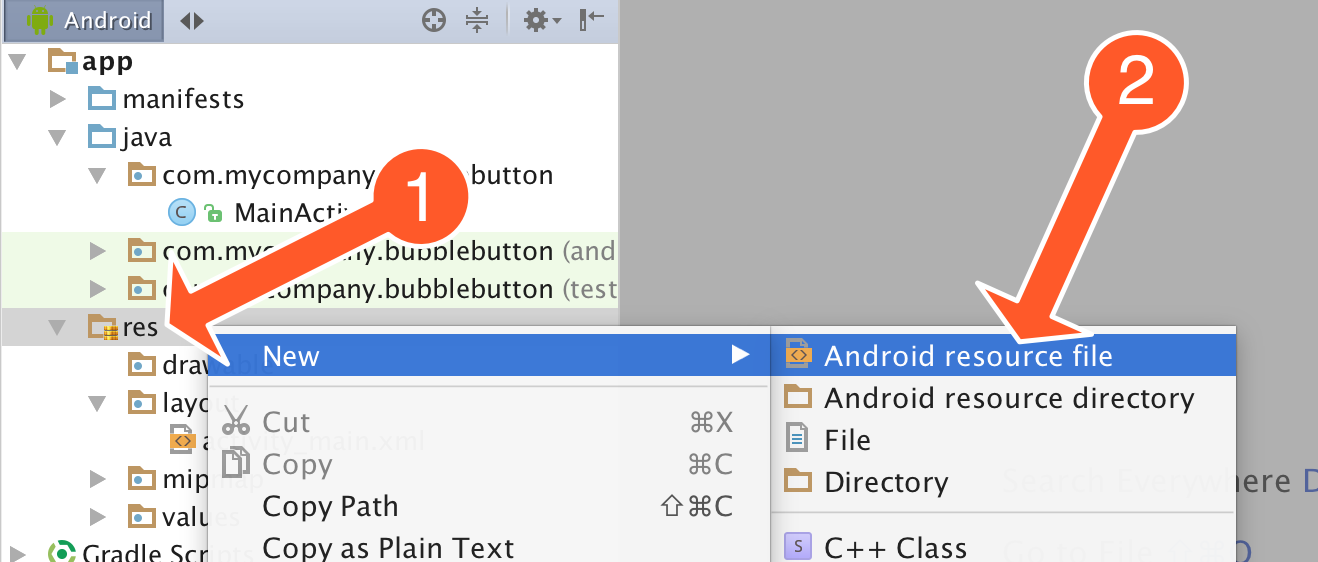
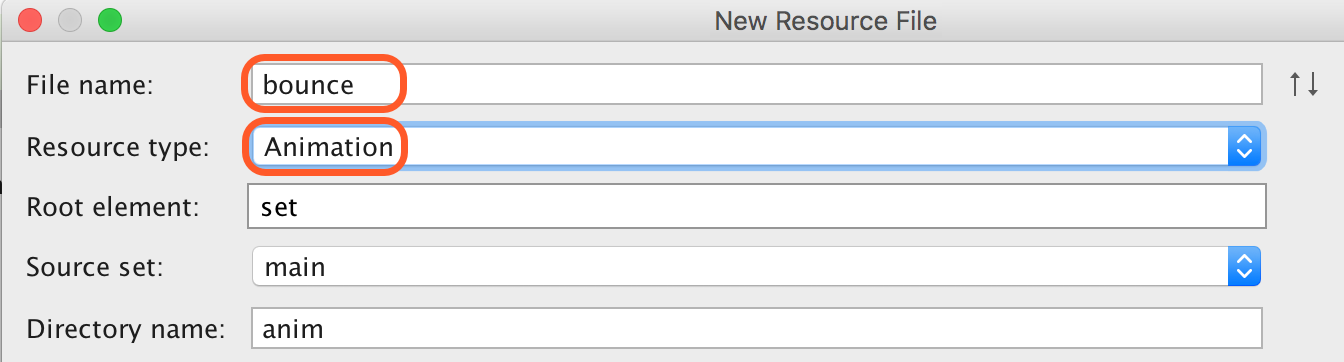
- Write bounce as the name of the file
- Choose the Animation resource type. The directory name field will change to anim.
Next, open the res/anim/bounce.xml file that was created for you and replace its content with the following code.
<?xml version="1.0" encoding="utf-8"?>
<set xmlns:android="http://schemas.android.com/apk/res/android" >

    <scale
        android:duration="2000"
        android:fromXScale="0.3"
        android:toXScale="1.0"
        android:fromYScale="0.3"
        android:toYScale="1.0"
        android:pivotX="50%"
        android:pivotY="50%" />
</set>
This code creates an animation that changes the size of a view from 30% to 100% during two seconds.
3) React to button tap
Now we add the code that animates the button on tap. Add the following method to your activity Java file.
public void didTapButton(View view) {
    Button button = (Button)findViewById(R.id.button);
    final Animation myAnim = AnimationUtils.loadAnimation(this, R.anim.bounce);
    button.startAnimation(myAnim);
}
If you run the app and tap the button it will animate smoothly from smaller to bigger size.

4) Implement the bounce interpolator
Next, we write the code that adds the bounce effect to the scale animation.
- Create a new Java Class file in your app module and name it MyBounceInterpolator.
- Open the Java file that was created and replace the class code with the following.
class MyBounceInterpolator implements android.view.animation.Interpolator {
    private double mAmplitude = 1;
    private double mFrequency = 10;

    MyBounceInterpolator(double amplitude, double frequency) {
        mAmplitude = amplitude;
        mFrequency = frequency;
    }

    public float getInterpolation(float time) {
        return (float) (-1 * Math.pow(Math.E, -time/ mAmplitude) *
                Math.cos(mFrequency * time) + 1);
    }
}
I will explain how this code works in a moment.
5) Use the bounce interpolator
Finally, open your activity Java file again and replace the entire didTapButton method with the following code.
public void didTapButton(View view) {
    Button button = (Button)findViewById(R.id.button);
    final Animation myAnim = AnimationUtils.loadAnimation(this, R.anim.bounce);

    // Use bounce interpolator with amplitude 0.2 and frequency 20
    MyBounceInterpolator interpolator = new MyBounceInterpolator(0.2, 20);
    myAnim.setInterpolator(interpolator);

    button.startAnimation(myAnim);
}
Here we added the MyBounceInterpolator to the animation with setInterpolator method. If you run the app and tap the button it will animate with the spring effect.

How the bounce animation interpolator works
We initialized the MyBounceInterpolator object with two arguments.
MyBounceInterpolator interpolator = new MyBounceInterpolator(0.2, 20);
- The first value
0.2is the bounce amplitude. The higher value produces more pronounced bounces. - The second value
20is the frequency of the bounces. The higher value creates more wobbles during the animation time period.
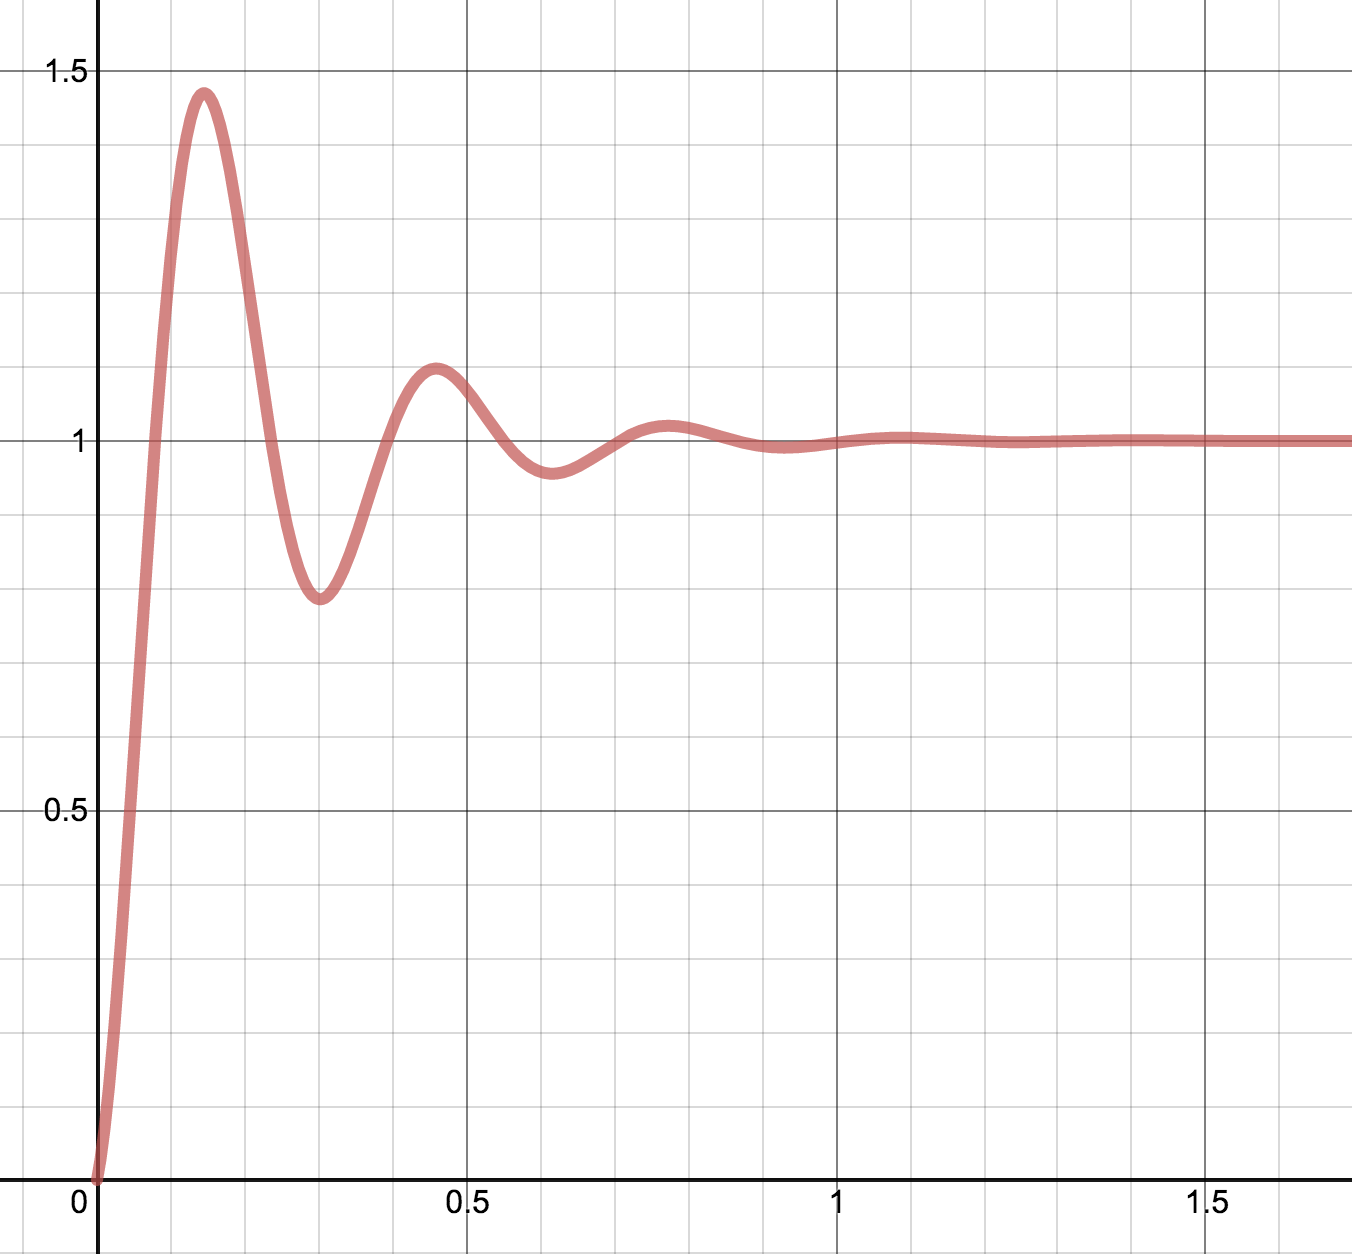
In order to achieve the bounce effect the getInterpolation method maps the time using the following function:

In this equation, a and w are the amplitude and frequency values and t is the time. The equation contains a cosine function that causes the periodic wobbles during the animation. In order to reduce its amplitude with time we multiply the cosine by an exponential function. The following graph shows that the animation overshoots above the value 1 first and then settles closer to it.
Reference
- Source code for the demo Android app.
- Live graph of the time interpolator function.
- Spring button animation tutorial for iOS/Swift.
- A switch control made by Alexander Kolpakov that uses bounce interpolator.