Testing activity in Android Studio. Part 2.
This is the second part of the three-part tutorial. In the first part we learned how to create a new project, add a test configuration and run the tests.
Now we will write our first test. We will be using test-driven development approach (called TDD). We will build the app by first writing the tests and then implementing the actual app functionality.
The Greeter app
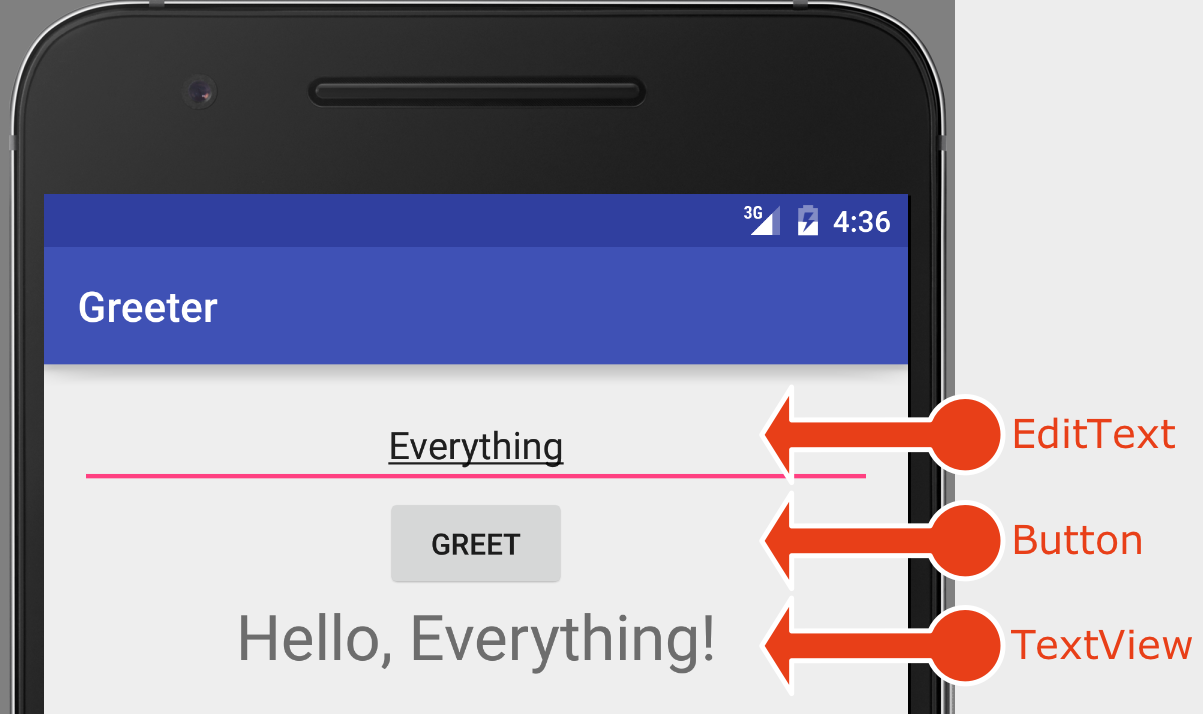
The app we are building will have three components:
- An EditText where user enters name.
- A “Greet” Button.
- And a TextView that will show the greeting message.
1. Setting up activity testing
Let’s start by adding some testing dependencies to the Gradle file. We will need to do two modifications. Firstly, add the following text to the dependencies section of your module gradle file.
androidTestCompile 'com.android.support:support-annotations:24.0.0'
androidTestCompile 'com.android.support.test:runner:0.5'
androidTestCompile 'com.android.support.test:rules:0.5'
androidTestCompile 'com.android.support.test.espresso:espresso-core:2.2.2'
And secondly, add the following text to the defaultConfig section of the same module gradle file.
testInstrumentationRunner "android.support.test.runner.AndroidJUnitRunner"
Android Studio will ask to sync the project. Click the “Sync Now” button.
My complete module gradle file looks like this. Your gradle may have different library versions.

2. Create a test class
Next, we will add a new class to the test package.
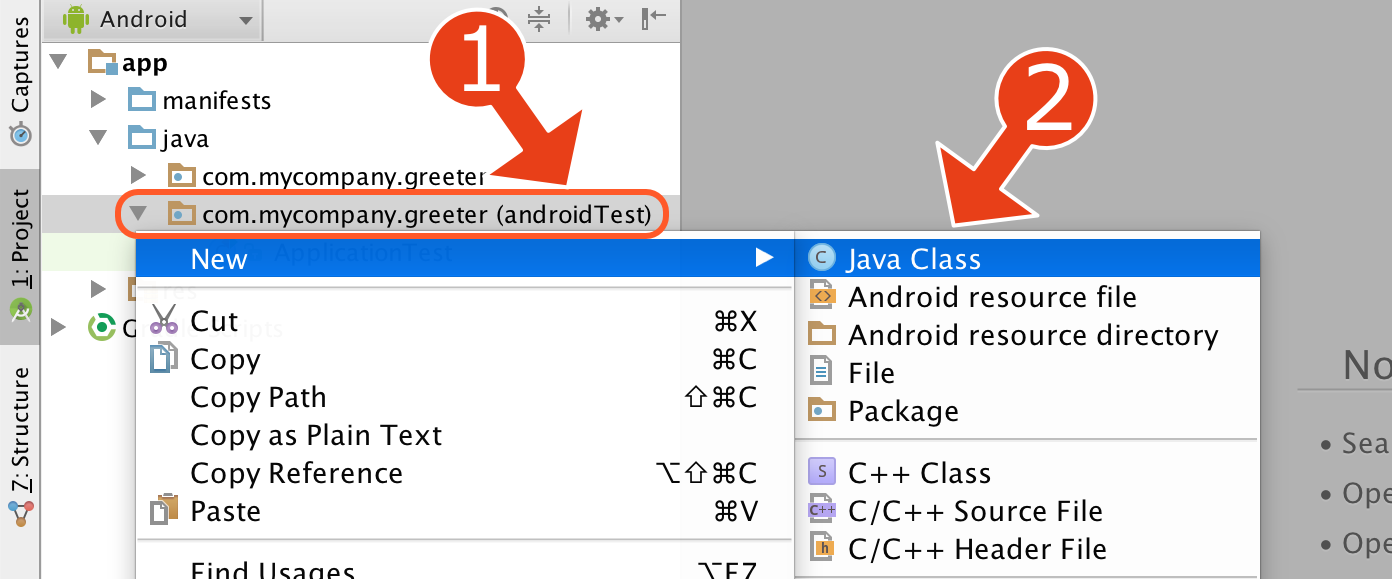
- In Project tool window expand app > java folder.
- Right click on com.mycompany.greeter (androidTest) package. Please note that you have three packages named com.mycompany.greeter. You need to click on the one that has androidTest text.
- Select New > Java Class from the context menu.
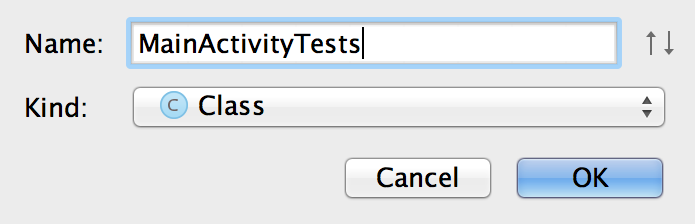
You will be asked to enter the name for the class. Call it MainActivityTests, plural.
Android Studio will create a new class that will look like this:

The class file will have the following code
package com.mycompany.greeter;

public class MainActivityTests {

}
3. Adding annotation to the test class
Add the @RunWith(AndroidJUnit4.class) annotation above the MainActivityTests class definition.
The class file will have the following code
package com.mycompany.greeter;

@RunWith(AndroidJUnit4.class)
public class MainActivityTests {

}
Import missing package
You may see these error messages:
Cannot find symbol class RunWith.
Cannot resolve symbol ‘AndroidJUnit4’.
To fix this error we need to import missing packages by adding the following code to the top of the test file.
import android.support.test.runner.AndroidJUnit4;
import org.junit.runner.RunWith;
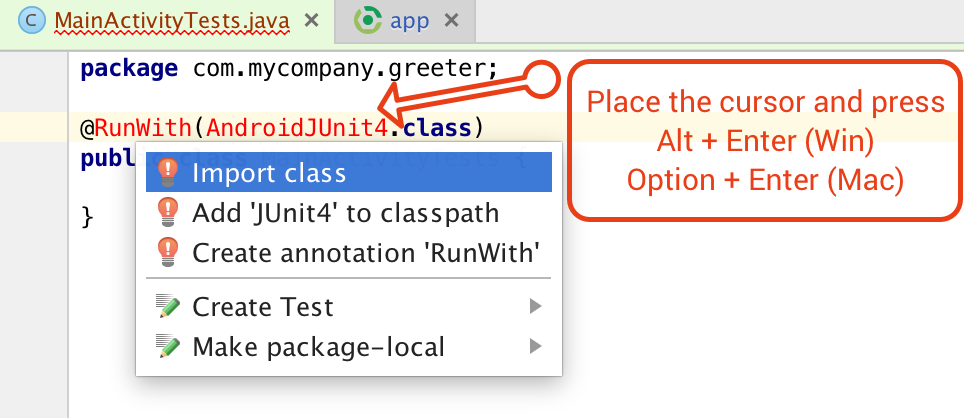
Another way of adding missing packages is by using a shortcut.
- Put your cursor to the
RunWithtext in your code. - Press Alt + Enter on Windows or Option + Enter on Mac.
- Select Import Class from the context menu.
- Do the same for
AndroidJUnit4text.
Your code will look like this:
package com.mycompany.greeter;
import android.support.test.runner.AndroidJUnit4;
import org.junit.runner.RunWith;

@RunWith(AndroidJUnit4.class)
public class MainActivityTests {

}
4. Launching activity in tests
Just a reminder, our goal here is to test our android activity. This is done by adding the following code to the MainActivityTests class.
@Rule
public ActivityTestRule<MainActivity> mActivityRule =
    new ActivityTestRule<>(MainActivity.class);
The code we just added may look like a bit of magic. It actually is almost magic as it automatically launches MainActivity during the test.
You will also need to add the missing imports to the top of the MainActivityTests file:
import org.junit.Rule;
import android.support.test.rule.ActivityTestRule;
The full code for MainActivityTests looks like this:
package com.mycompany.greeter;
import android.support.test.rule.ActivityTestRule;
import android.support.test.runner.AndroidJUnit4;

import org.junit.Rule;
import org.junit.runner.RunWith;

@RunWith(AndroidJUnit4.class)
public class MainActivityTests {
    @Rule
    public ActivityTestRule<MainActivity> mActivityRule
        = new ActivityTestRule<>(MainActivity.class);
}
5. Write the first test
Excellent! We are done with all the preparations and can write our first test. Add this method to your MainActivityTests class.
@Test
public void testGreet() {

}
You will need to add the missing dependency to the top of the test file import org.junit.Test;.
The test is empty for now and we will extend it later. Here is the full test code:
package com.mycompany.greeter;
import android.support.test.rule.ActivityTestRule;
import android.support.test.runner.AndroidJUnit4;
import org.junit.Rule;
import org.junit.Test;
import org.junit.runner.RunWith;

@RunWith(AndroidJUnit4.class)
public class MainActivityTests {
    @Rule
    public ActivityTestRule<MainActivity> mActivityRule
            = new ActivityTestRule<>(MainActivity.class);

    @Test
    public void testGreet() {

    }
}
4. Run the test
Finally, let’s run our first test.
- Select Test in ‘com.mycompany.greeter’ configuration from the dropdown located next to the Run button on the toolbar. If there is no test configuration please refer to the previous part of tutorial and create it.
- Click Run button.

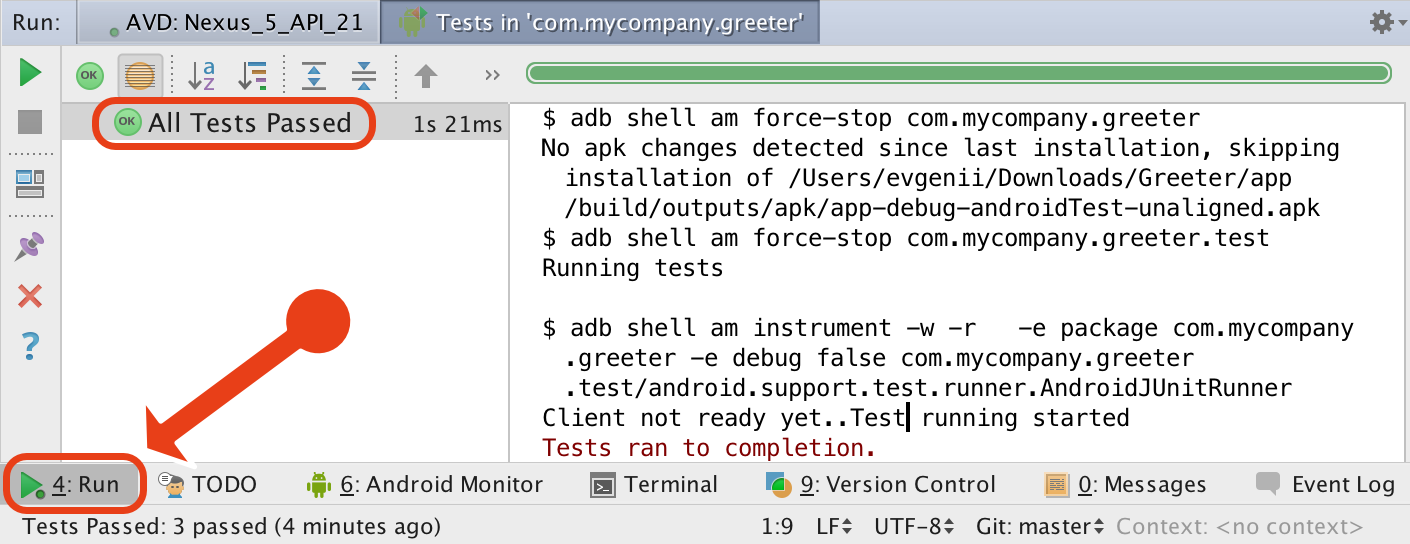
5. Check test results
If all went well you will see green light for the tests in the Run window. You can open this window from View > Tool Windows > Run menu or by clicking on Run button in the bottom left corner.
What’s next?
Very nice! We have written our first test. Next we will extend our test method. It will enter a name in the text input, tap the “Greet” button and verify the greeting message.
Reference
- Part 1, Part 2 and Part 3 of this tutorial.
- Sample Code for the Greeter app
- Building Your First App - Android Developers